Arduino
SrikantIn this ever-growing world of IoT (Internet of things), there are a lot of IoT devices which are openly available to us in the market. But for students, learners or a hobbyist who actually wants to play around or make an IoT device, the first criteria is to learn the basics by playing around with IoT boards like Arduino, Node mcu, Raspberry pi, etc., which helps in the basic development of the subject and could also be used in future hardcore projects. And if you ever Google IoT boards, the first name that would pop up on every site would be an Arduino.
WHAT’S AN ARDUINO?
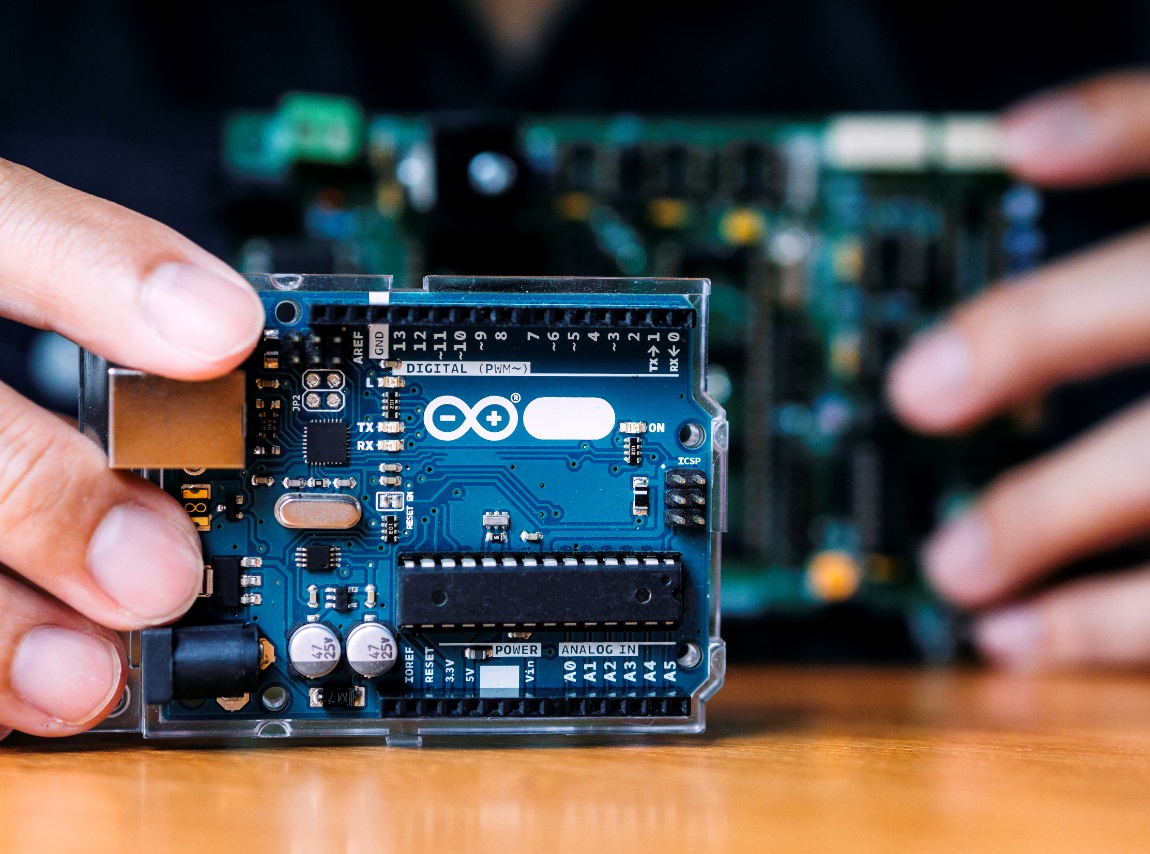
An Arduino is an open- source electronics platform which consists of a hardware micro-controller board and a software IDE. As the word open-source suggests, its source code and data sheet are made public, so anyone can modify or redistribute it without worrying about legal issues. The Arduino has different micro controller boards like Uno, Mega, Lilypad, Leonardo, etc. But the Uno is much more commonly used and thus people tend to call it as “Arduino” while referring to other boards as Arduino Mega, Lilypad Arduino, Arduino Leonardo, etc. All the boards use the same Integrated Development Environment (IDE) known as Arduino IDE which is a software used to edit, debug and compile the codes.
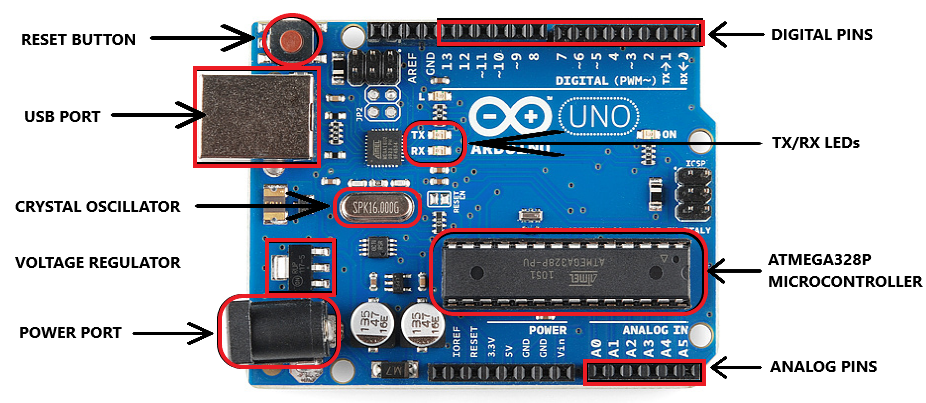
IMPORTANT PARTS OF AN ARDUINO UNO:
- USB Port
- Power Port
- Voltage Regulator
- Micro-controller
- Crystal Oscillator
- Digital Pins
- Analog Pins
- Reset Button
- TX/RX LED
Arduino Detailed Description
USB PORT
The Arduino uses an USB type B port from where the Arduino can be connected to the PC by using an USB 2.0 type A/B. This pathway between the Arduino and the PC is used to upload the codes on the board and it also acts as a power supply for the board.
POWER PORT
The Arduino also has a barrel power jack from where it can also be powered up directly from the AC mains by using an AC to DC adapter or by using a battery. The input voltage to this port should not exceed 20V.
VOLTAGE REGULATOR
The function of the Voltage Regulator is to convert the input voltage to 5V, stabilize the voltage and provide it to the other parts on the board.
ATMEGA328P MICRO CONTROLLER
The Arduino has a pre-programmed built-in Atmega328P micro-controller which is considered to be the brain of the board. It is 8-bit, 28 pin micro-controller which is the largest on the board. It has a 32Kb flash memory to store codes, a RAM of 2KB and an EEPROM of 1Kb.
CRYSTAL OSCILLATOR
The Arduino uses a 16MHz Crystal Oscillator. The Crystal Oscillator provides a clock to the micro-controller. 16MHz Crystal ticks 16 million times a second and the micro-controller does an operation at every tick.
DIGITAL PINS
An Arduino Uno has 14 digital input/output pins out of which 6 pins can be used as PWM output. Digital pins provide 5V voltage when they are high and each pin can provide current up to 40mA.
ANALOG PINS
An Arduino Uno has 6 analog input/output pins which can also be used as digital input/output pins. The Analog input voltages gets converted into digital bits by an ADC for the micro-controller to understand.
RESET BUTTON
The reset button of the Arduino is used to rerun the program uploaded on the board from the start.
TX/RX LED
TX stands for transmit and RX stands for receive. These LEDs glow up and act as an indicator when the Arduino transmits or receives data.
INTEGRATED DEVELOPMENT ENVIRONMENT (IDE)
IDE stands for integrated development environment. It is a software which generally consists of a built-in source code editor, build automation tools, debugger and a compiler. An IDE makes work for programmers much easier as most of the tools required for working on a particular code are built-in, in it. Some IDEs also have the feature that helps in predicting related commands when the programmer types its initials and the Arduino IDE is one of them. In real life terms, it is like a kitchen where u can find everything necessary to make food rather than using your living room and wasting time trying to find the useful items for it.
ARDUINO IDE
Arduino IDE is one of the simplest IDEs and the codes are written in C and C++. It can be installed in Windows, macOS, Linux and is also available as a web app. Arduino IDE doesn't have a debugger and it mainly consists of a code editor, compiler, a loader and a serial monitor. Arduino IDE is not just limited to Arduino boards, there are a wide list of boards also supported by this IDE.
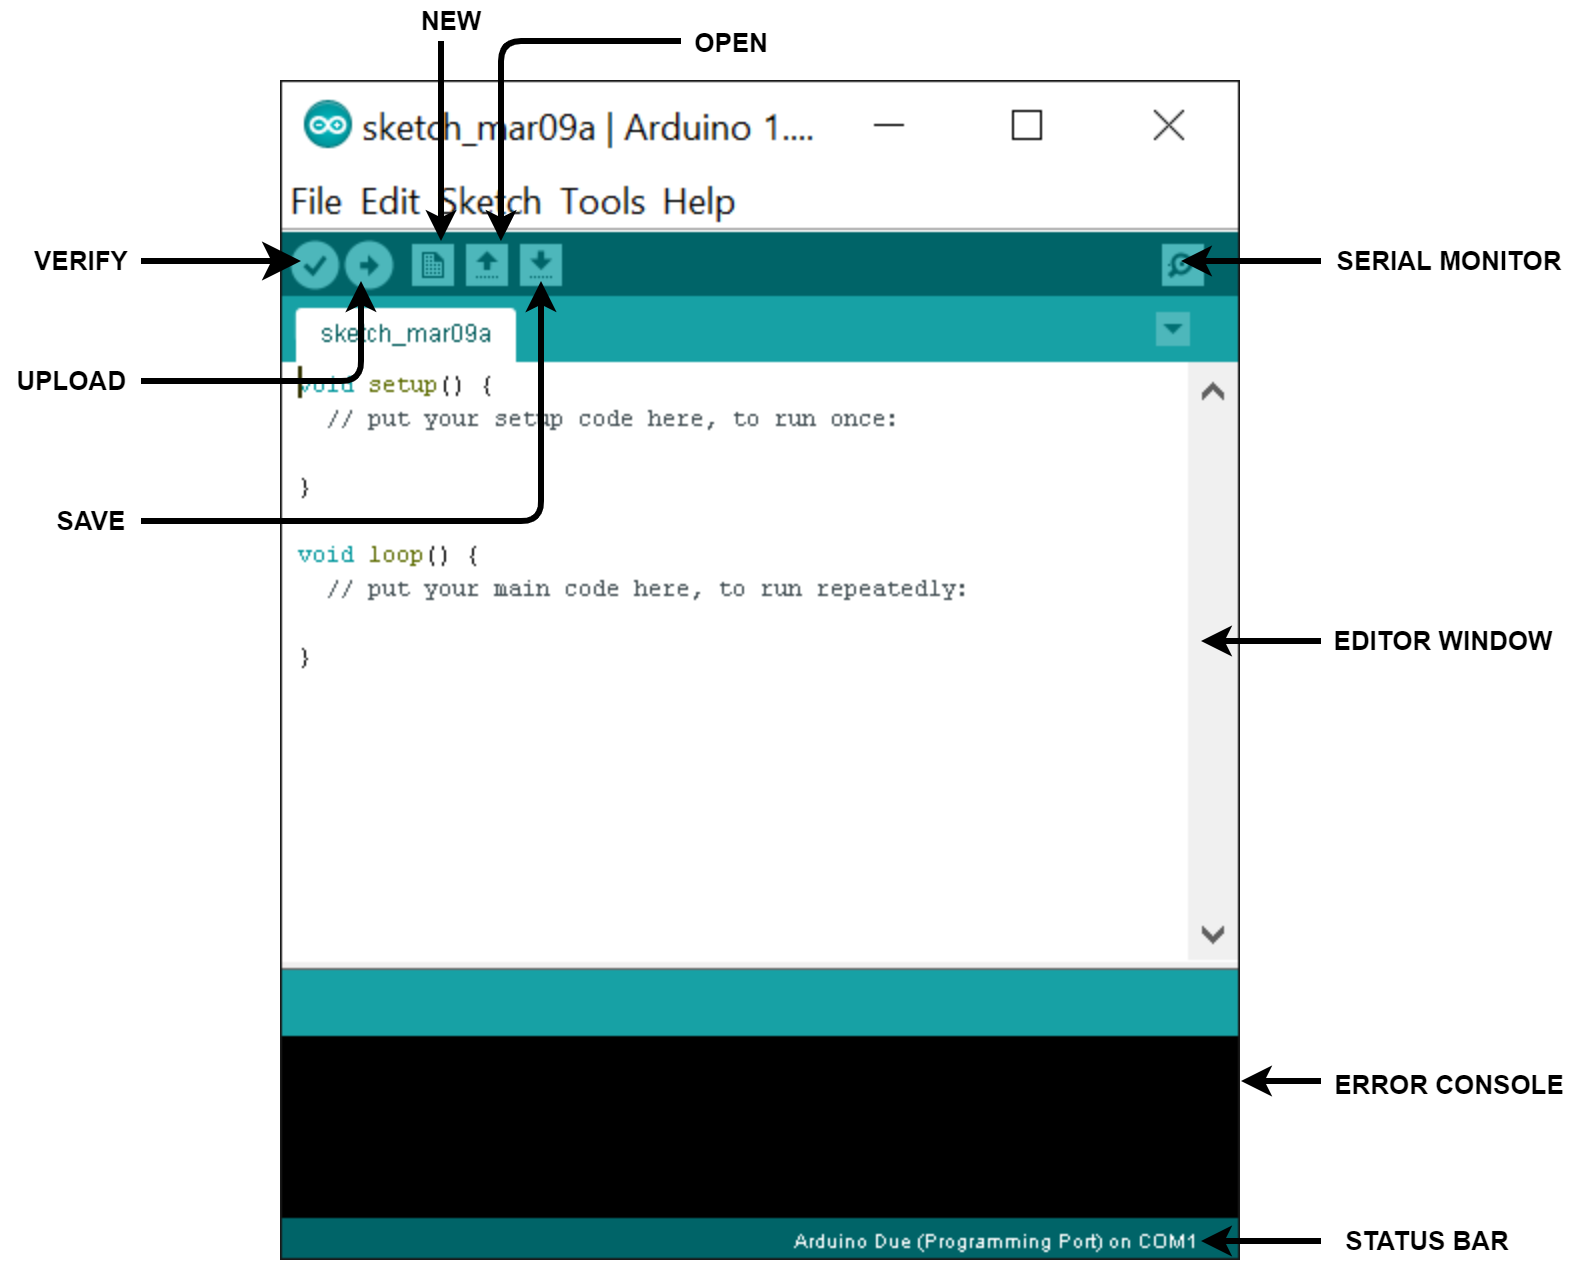
Arduino IDE Description
VERIFY
The Verify button of the Arduino is used to compile the code from the editor window. It checks all the syntaxes and displays the errors in the console.
UPLOAD
The Upload button compiles and uploads or transfers the code to the Arduino board.
NEW
The New button is used to open a new window of the application with an unedited default editor window.
OPEN
The Open button is used to open any previously saved programs or any Arduino programs present in your device.
SAVE
The Save button is used to save your current work.
SERIAL MONITOR
The Serial Monitor button opens a serial monitor window that communicates by receiving and sending serial data with the Arduino. It allows the users to send data to the Arduino and also receive back. It only functions when the board is connected to the Arduino IDE.
EDITOR WINDOW
The Editor Window is used to write codes.
ERROR CONSOLE
The Error Console displays all the errors while compiling, uploading, etc. It also displays information when a code is uploaded successfully.
STATUS BAR
The Status Bar is used to check the COM port at which the Arduino is connected. It also displays the type of board connected.